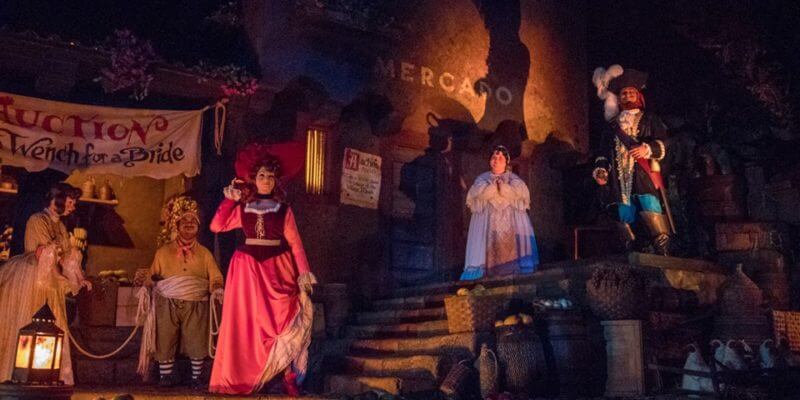
There’s no secret that Disney’s Haunted Mansion is a favorite attraction of mine. I’ve always wanted to photograph the spirits and scenes within this granddaddy of haunted houses.
Thanks to the advent (and ever improving capabilities) of digital photography, capturing quality images in dark rides has never been easier. With a bit of practice and patience, snapping that special scene is only a few steps away.

Instant review, no more wasted film, no more development costs (and disappointments) are but a few advantages photography in the digital realm has over its film-based predecessor. Advanced and better-quality imaging sensors, as well as more readily available lens options, add to the list. After the initial expense, there is little more that is required for maintaining a good kit.

For me, it started with a used DSLR (digital SLR) older model Canon camera. Learning to compose images where each one tells a story outweighed any urgency for advanced equipment. Having a camera that allowed for low light photography gave a great start to a fantastically fun hobby.

Common concepts
While a decent DSLR comes in handy in really dark environments and quality lenses make taking low light images much easier, today’s smart phones can also produce good images.
1. No flash photography, please
On most smartphones, it is pretty easy to disable the automatic flash. Unless shooting something fairly close, this bright light often has little to no advantage. Shooting shows/fireworks or similar subjects, that same light can not only ruin the image with light bouncing off nearby people or items, it is also usually not sufficiently strong enough to illuminate distant objects (and usually ruins show lighting). More importantly, it is very rude and disruptive to those around.
2. Screen scandals
One of the biggest drawbacks to using smartphones in darkened attractions can be caused by bright screens not only corrupting the image, but also ruining the ambiance for those around who are also trying to enjoy the same ride experience this can also be a problem for those using a DSLR (if they are not able to cover/disable or turn around the main viewing window).

3. Support Systems
It is possible to get good low light images on a smart phone. The key is keeping the lens still long enough to capture a clear photo. A small tripod (or monopod) is the best way to ensure a steady shot for both DSLR cameras and smart phones. Outside of that, bracing the camera/phone (and/or yourself) on a firm surface can help with this.

Choosing the correct settings
The following suggestions offer solutions for those using cameras with advanced features.
4. Switch from full Auto
This gives more control over what the camera does. It will prevent the flash from auto firing in the attraction (which is not only discourteous to other guests, it is usually not allowed in most dark rides).

Use Aperture Priority shutter speed no lower than lens length (TV – Time value for Canon; S – Shutter priority for Nikon)
5. Manual Focus
With fast lenses/low aperture settings, depth of field is much narrower. Taking the camera off manual and manually pulling the desired subject into focus ensures that the desired topic will appear clearly in the image.

6. Higher ISO
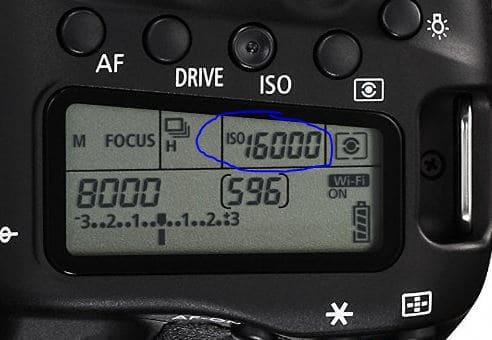
When film photography was still common, different film speeds were available for photographers to use for varying scenarios. A roll film with an ISO of 100, 200 or even 400 worked great in better lit scenarios. Equally, higher ISO films (1000 or 1600) were created for lower lit images.
Today’s digital cameras emulate the same settings, only with much higher settings, allowing for photos in even less light. As with the film feature, one thing to keep in mind is that the higher the ISO setting the more potential for grainy/less crisp images in low lighting. Experimenting with the camera’s ISO range is recommended prior to (or as part of) aiming for low light images in dark rides.
An example of when ISO is too high/grainy:

7. Image Stabilization
As previously stated, a stable camera ensures a better image, especially in low light when shutters aren’t firing as fast (a slight shake or sudden move can yield blurred light streaks in the image). Many of today’s DSLR lenses include an image stabilization button that can help with small movement mishaps.

8. Faster Lens
While there is a wide range of fast lenses (with low = wide aperture settings) to choose from, these can get pricey. The go-to lens I now use for low light can cost as much as many basic DSLR camera bodies on the market today (Sigma 18-35mm lens with a constant 1.8 aperture throughout its focal length). However, I’ve received equally exciting images with my “nifty fifty” prime lens (no zoom option), which, for Canon, comes in at a much lower cost ($125). The inability for zooming in or out of the photograph’s subject needs to be taken into consideration when planning the shot (especially where dark ride scenes can be closer to the ride vehicle).

9. Practice!
Finally, the best path to perfect dark ride images, however, lies not from equipment but practice. Take photos as often as possible. Don’t be afraid to try something new or different in either settings or shot angles.

Today, the advantage of digital imagery (either from a smartphone or complex camera) offers opportunities for trying multiple techniques, settings, and shots. Hopefully, applying any of these 9 tips for dark ride image acquisition will yield fiendishly fun photos and exciting experiences.
Source and images: Amazon, Michael Gavin